When selecting valances and curtains, understand the importance of rod drops and returns. Measure rod drop between 18 to 24 inches for the correct length above the window. Return measurements should be at least 4 inches to avoid light gaps that compromise privacy. Always measure window width and add a 1-inch allowance on each side for a tailored fit. Make sure to coordinate fabrics and mounting techniques for a cohesive appearance. Discover further tips to perfect your window treatments.
Key Takeaways
- Rod drop should be 18-24 inches to provide a polished look and cover the top of the window frame effectively.
- Returns are essential; at least 4 inches help conceal brackets and reduce light gaps for enhanced privacy.
- Measure width accurately, adding a 1-inch allowance on each side, and include returns in total width for a tailored fit.
- Coordinating colors and patterns between valances and curtains enhances visual harmony and balances texture within a room.
- Energy-efficient window treatments improve indoor temperatures and aesthetic appeal, promoting a cohesive design throughout your space.
Understanding Rod Drops in Window Treatments
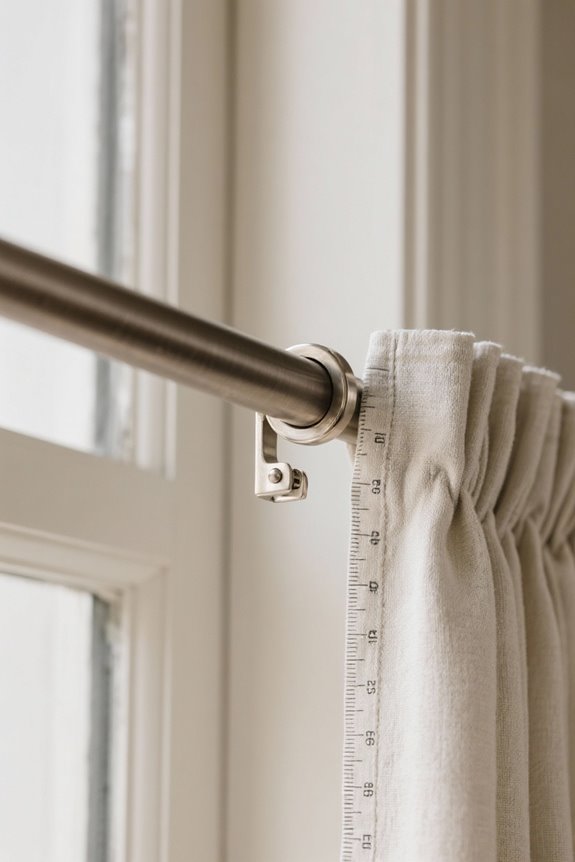
Understanding rod drops in window treatments is essential for achieving the right aesthetic. The rod drop measures the distance from the top of the curtain rod to the bottom of the valance or curtain, typically between 18 to 24 inches. For standard installation, make sure the rod drop covers the top 2 to 6 inches of the window frame. This height provides a finished appearance without blocking the view. When measuring, consider the overall height of the room, especially in spaces with high ceilings. Adjust the rod’s position to accommodate architectural features like crown molding. A well-chosen rod drop can affect how spacious a room feels, enhancing its overall visual appeal. To improve sleep quality, consider using magnetic blackout shades that offer 100% darkness and insulation benefits.
The Importance of Return Measurements

When selecting window treatments, consider the impact of return measurements. Return measurements determine how far a valance extends from the wall, which enhances its appearance. Typical return depths range from 2 to 4 inches. This depth helps cover the bracket and contributes to a polished look. Measure the return accurately to create a seamless design, especially when using a valance on the rod with draperies. Remember to factor in the return when calculating total width. For instance, a 4-inch return adds an extra 8 inches to the valance’s overall width. By accommodating return measurements, you achieve a balanced and visually appealing window decor, elevating the overall style in your space. Incorporating blackout roller shades can further enhance privacy and light control, adding functionality to the aesthetic appeal.
How Returns Affect Light Gaps and Privacy
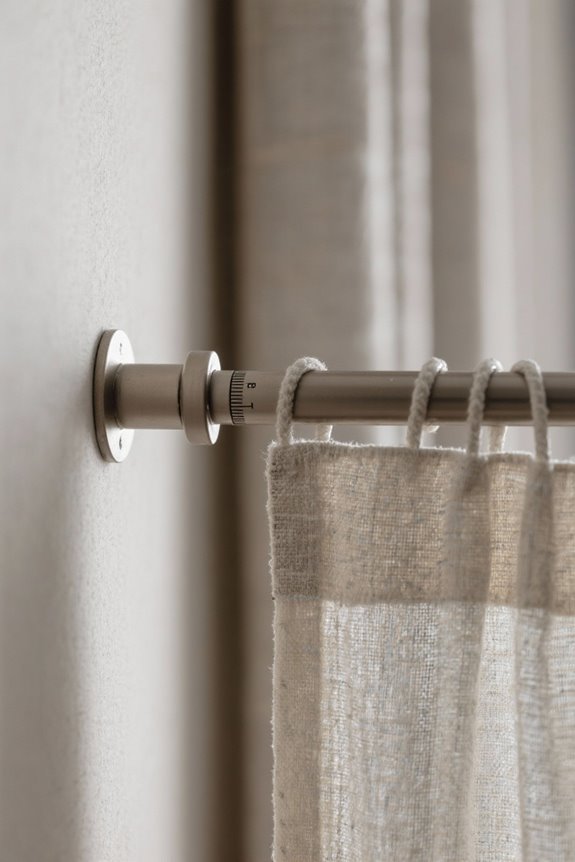
Returns on valances greatly influence light gaps and privacy within a room. They add depth by extending fabric toward the wall, reducing noticeable gaps. A return measurement of at least 4 inches is recommended to effectively cover window edges. This helps prevent light from leaking into spaces where privacy is important. Without returns, light gaps can increase, allowing more light to enter and compromising privacy. For heavier fabrics, consider a return of at least 5 inches to guarantee adequate overlap with the valance. Including returns improves not just functionality but also the overall aesthetic of window treatments. Prioritize returns in your design for enhanced privacy and peak light control within your living spaces. Additionally, blackout curtains with noise reduction properties can further enhance your living environment by minimizing ambient noise and providing a quieter space.
Measuring for a Perfect Valance Fit
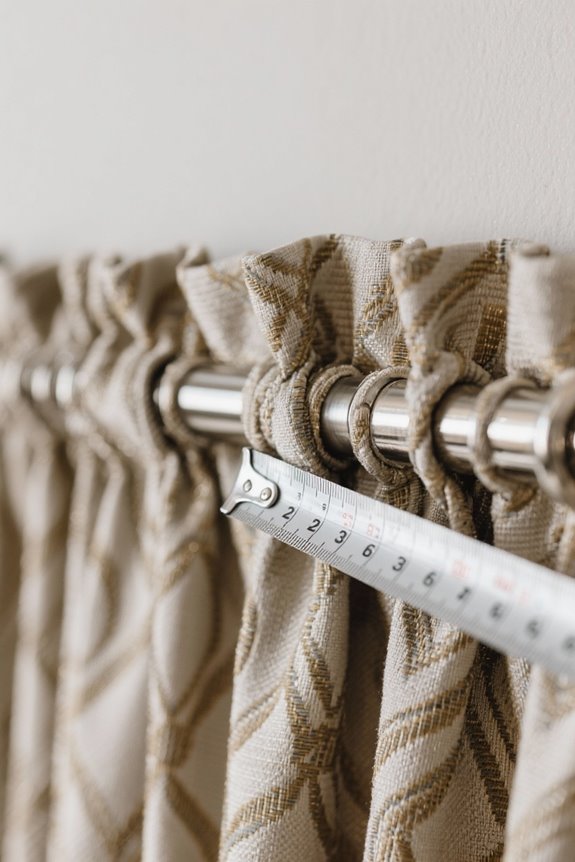
To achieve a perfect fit for a valance, measuring accurately is crucial. Start by measuring the window width. Add a small allowance of 1 inch on each side for a tailored look. This makes the total width calculation window size plus 2 inches. Next, include the return measurement, which indicates how deep the valance extends from the wall. For example, if the valance comes with a 4-inch deep return, add 8 inches to the calculated width. This guarantees compatibility with brackets and aesthetics. If pairing with heavy draperies, consider additional space of at least 5 inches behind the valance. When selecting a ceiling fan for the room, prioritize energy-efficient designs to ensure comfort while reducing electricity costs. Following these steps will help achieve a visually pleasing and functional result.
Factors to Consider When Choosing Valance Depth
Choosing the right depth for a valance considerably impacts the overall appearance of window treatments. The typical return depth ranges from 4 to 5 inches. This depth helps conceal curtain rods and hardware effectively. When selecting a valance, consider the widths of adjacent treatments to maintain balance in the space. A deeper return can address unwanted light gaps, especially when paired with heavier drapery, enhancing both privacy and light control. Measure and plan the return depth carefully to avoid fit issues with curtain rods. An improper depth leads to a visually unappealing hanging style. Incorporating cooling technologies and features in hybrid cooling mattresses can also contribute to overall comfort and sleep quality. Ultimately, consider aesthetics and functionality together to choose a valance depth that meets all requirements for a polished look.
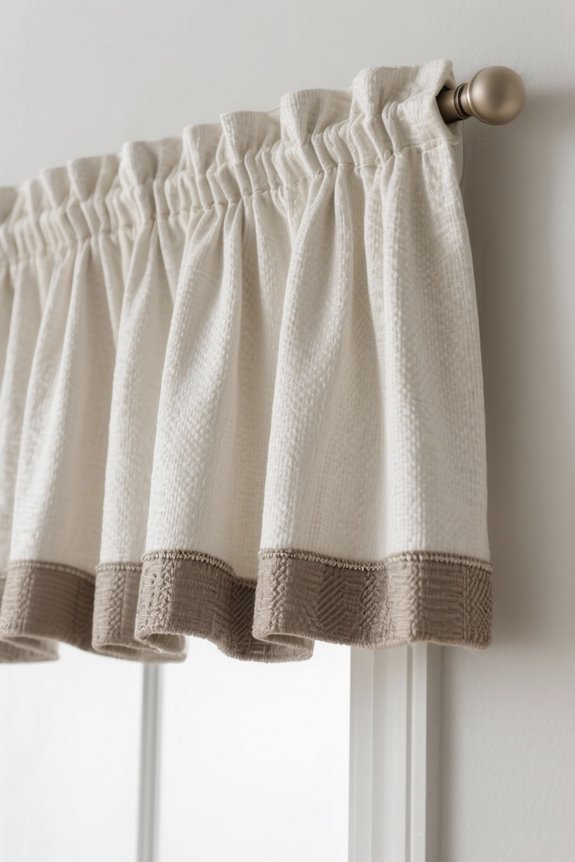
Hanging Techniques for Seamless Rod Drops
Achieving a seamless look when hanging rod drops is essential for a polished window treatment. Hang rod pocket valances to cover 2 to 6 inches of the window for a clean appearance. Mount the rod 1 to 2 inches below the ceiling, allowing enough space for brackets and crown molding. For gathered valances, use 2 to 3.5 times the window width in fabric to guarantee proper fullness and eliminate light gaps. Install sturdy brackets every 30 to 36 inches to avoid sagging. Before finalizing the installation, hold the valance in place. Check its alignment to guarantee full coverage and that it does not obstruct the view or create significant light gaps along the top or sides. Consider using high-density breathable mesh for enhanced airflow and insect protection in outdoor setups.
Common Mistakes in Measuring Returns
Common mistakes in measuring returns can considerably impact the final appearance of a window treatment. Many individuals overlook the return measurement, leading to gaps in light control and improper fitting. Always measure the return depth, which should ideally be around 4 to 5 inches for most valances. An insufficient return can reveal curtain rod brackets, detracting from aesthetics. Remember to position the valance away from the wall to guarantee drapery hardware is covered fully. Also, measure both the valance width and return together to prevent discrepancies in total coverage. These careful measurements guarantee a polished look and enhance the overall functionality of your window treatment, avoiding unattractive gaps and an unfinished appearance. When selecting a lamp for your bedside, prioritize multiple brightness levels to suit different activities and ensure comfort.
Enhancing Room Aesthetics With Proper Geometry
Proper geometry in window treatments plays a significant role in enhancing room aesthetics. Measure rod drops to cover the upper 2-6 inches of the window. This allows for an unobstructed view while improving visual appeal. Plan returns based on style; a deeper return creates a polished finish by concealing underlying treatments. Ascertain valances are 1-2 times the window width, allowing for slight gathering without bulk. Minimize light gaps by overlapping the window’s edge by at least 4 inches on both sides. Consider adding geometric patterns within valances and curtains. This increases visual interest while maintaining balanced proportions, avoiding a cluttered look. Correct geometry supports a harmonious design, elevating the overall atmosphere of the room. Additionally, thermal insulation in curtains can contribute to energy savings by regulating room temperature and reducing heating/cooling costs.
Practical Tips for Achieving Optimal Light Control
When considering light control in window treatments, careful measurements and planning are essential. Choose a valance that is at least 4 inches wider than the window frame on each side to minimize light gaps. Guarantee the valance drop covers 2-6 inches above the window to block light where it meets the wall. For board-mounted valances, a return depth of at least 4 inches is recommended to conceal light around the edges. Use a rod pocket design with a tension or standard rod to bring the fabric closer to the wall, further reducing light seepage. Additionally, layering long, lined curtains beneath the valance enhances light control, providing extra coverage and visibility management for various situations. Consider incorporating blackout canopy bed curtains to achieve a dark sleeping space, as they are designed with high-quality materials like microfiber or polyester for durability and functionality.
Coordinating Valances and Curtains for a Cohesive Look
Coordinating valances and curtains is essential for creating a unified look in any room. Begin by choosing valances and curtains that share complementary colors or patterns. This guarantees a cohesive aesthetic throughout the space. Select a valance drop of 18 to 24 inches to cover the top portion of the window while allowing light in. Pair heavy velvet curtains with lighter cotton valances to balance texture. Ascertain valances extend at least 4 inches beyond the window frame to eliminate light gaps. Use similar mounting techniques, such as both being rod-mounted, to enhance visual harmony. By following these guidelines, the window treatments will work together, promoting a seamless and attractive appearance in any room. Thermal insulated blackout curtains not only offer enhanced privacy but also contribute to energy efficiency by regulating indoor temperatures.
Frequently Asked Questions
How to Prevent Light Gaps on Curtains?
To prevent light gaps on curtains, one should consider blackout fabrics, utilize curtain lining options, and incorporate decorative valances. These approaches effectively block light, ensuring a cozy atmosphere and enhancing the room’s aesthetics.
How to Fix a Drooping Curtain Rod?
When Sarah noticed her living room curtains sagging, she realized the importance of proper curtain rod installation. Adding a center support and regularly checking curtain rod maintenance transformed the space, restoring elegance and functionality to her home.
How to Get Rid of a Gap Between a Curtain and a Wall?
To eliminate gaps between curtains and walls, one can utilize curtain spacing solutions, adjust wall mounted brackets, and apply fabric overlap techniques. These methods guarantee a snug fit, enhancing aesthetics and light coverage.
How to Stop Light From Coming Through the Sides of Blinds?
To stop light from coming through the sides of blinds, one might utilize blind adjustments, add side panels for extra coverage, and secure them with curtain clips, effectively minimizing light leakage during the day.