To mount a hammock indoors, secure eye bolts into wall studs, guaranteeing a minimum distance of 9 feet. Use a stud finder for accurate placement. If a hammock stand is needed, choose a strong, durable option. For added comfort, install an underquilt to eliminate air gaps—attach tightly and make adjustments as necessary. Use high-quality materials for insulation to maintain warmth. Following these guidelines will assure a safe and comfortable indoor hammock setup, offering additional insights for ideal installation.
Key Takeaways
- Ensure a minimum hang distance of 9 feet for optimal comfort and tension when installing your indoor hammock.
- Use a stud finder to locate strong wall studs for secure hardware installation and prevent drywall damage.
- Diagonal hanging techniques can maximize space utilization in smaller rooms while ensuring safety and stability.
- Attach underquilts snugly to minimize air gaps, enhancing thermal efficiency and comfort during colder weather.
- Consider budget-friendly insulation options like closed-cell foam pads or DIY underquilts from old sleeping bags for added warmth.
Materials and Tools Required
When installing a hammock indoors, specific materials and tools are necessary for a successful setup. First, acquire eye bolts or a complete hanging kit. You will also need a drill and an appropriate drill bit for secure mounting. A measuring tape is vital for determining the best hang distance, which should be at least 9 feet (2.7 meters) between mounting points. A stud finder is recommended to locate strong wall studs, ensuring the hammock is securely fastened. Additionally, use heavy-duty hardware, like steel S-hooks or carabiners, for reliable attachment points. Finally, consider using a Hammock Hang Calculator to determine proper angles and placement based on your space’s dimensions. For optimal comfort, ensure your hammock setup includes breathable materials to regulate temperature and provide a comfortable experience. Follow these guidelines for a safe and enjoyable hammock experience.
Recommended Products

SUPER ROOMY: Lazy Daze Hammocks are large enough to accommodate 2 people. The hammock bed size is 78.7 inches x 57 inches, the length from ring to ring is 144-inch, 164 inch long with 2 steel chain links. The maximum capacity is 450 pounds. This 12FT hammock has a spacious space, allowing you to stretch your body freely

OPTIMAL COMFORT AND DURABILITY: Experience unparalleled comfort with our double hammock, featuring 120 suspension cords that ensure even weight distribution. Enjoy stable and relaxing lounging in this outdoor and indoor hammock bed.
NO TREES, NO ROPES: This is the WORLD'S MOST POPULAR project on 𝑲𝑰𝑪𝑲𝑺𝑻𝑨𝑹𝑻𝑬𝑹 and 𝑰𝑵𝑫𝑰𝑬𝑮𝑶𝑮𝑶 with All-Inclusive Design that can meet all your home recreations or outdoor events needs. PATENED DESIGN is safer and easier to use than traditional tree hammocks, does not require straps in trees or climbing into the outdoor hammock.
Installation Guidelines and Recommendations

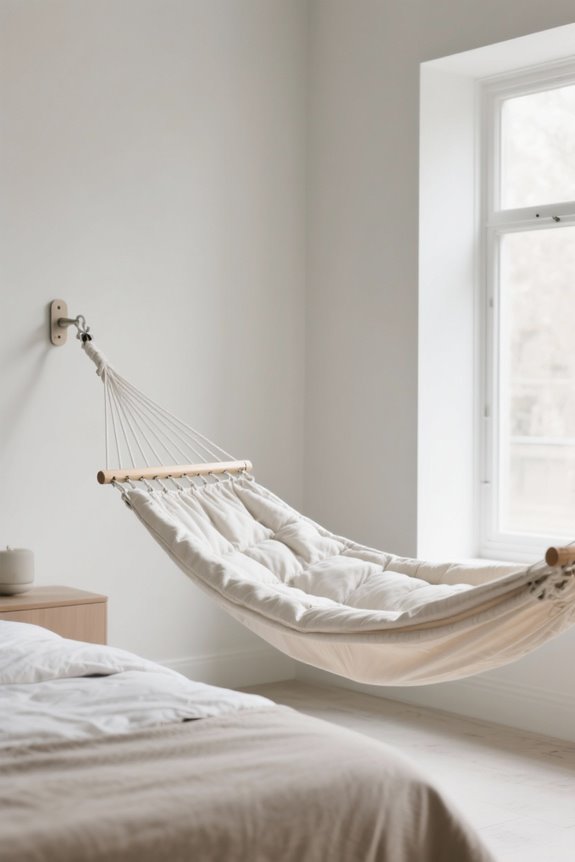
To guarantee a secure and effective installation of an indoor hammock, start by preparing the area where it will hang. Maintain a minimum hang distance of 9 feet (2.7 meters) to confirm proper tension and comfort. Locate wall studs accurately, typically found at corners and around window frames, to secure the installation hardware. Use diagonal hanging options to maximize space in smaller rooms while accommodating the hammock’s length. Safety features such as compliance with safety standards and the use of non-toxic materials are crucial when installing any hanging hardware to ensure user protection. Verify that all hanging hardware, such as eye bolts or S-hooks, meets recommended weight limits for safety. Finally, test the hammock’s weight and sag after installation to validate proper sit height and overall stability. Adhering to these installation guidelines will help create a secure indoor hammock setup.
Recommended Products

Premium Workout Comfort: Engineered by Mr. Khanh Trinh, with over 15 years of experience in Fitness & Calisthenics, our KT Pull Up Bar delivers unparalleled quality and comfort for pull-ups and chin-ups. Its height adjusts effortlessly across multiple levels from 46.45'' to 101.57'' (118 to 258cm) without the need for a spanner, enabling full-body stretches and swings. Perfect for users up to 6.56 ft (200cm) and 485 lbs (200kg), it facilitates superior workouts, allowing for kipping pull-ups, muscle-ups, and more

DURACORD ROPE: Synthetic blend feels soft like cotton yet wears like polyester; all weather rope resists common impurities and color shift; dense low stretch construction supports a steady lay for daily relaxing in sun or shade

Understanding Your Space Requirements

Evaluating space requirements is essential before installing an indoor hammock. Verify you have a minimum hanging distance of approximately 9 ft (2.7 m). Measure your room dimensions carefully, as typical bedrooms range from 10 to 12 ft (3 to 3.6 m), suitable for hammock installation. Identify secure mounting points, ideally located on wall studs near corners or windows. Utilize a stud finder for accurate placement. In smaller rooms, consider using diagonal hanging techniques. These help maximize available space while verifying safety and comfort. Always check hammock specifications to confirm the correct hang angles, as longer hammocks might require further adjustments. Mind the space requirements to maintain both functionality and safety in your indoor hammock setup. Additionally, using breathable polyester blends in your hammock can enhance comfort, especially if the room tends to be warmer.
Mounting Options for Indoor Hammock Installation

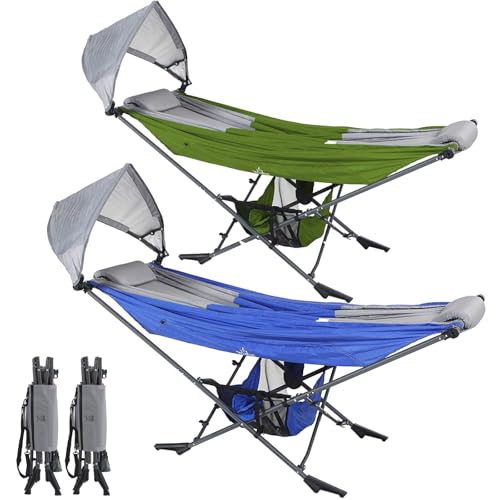
Selecting the right mounting option is essential for indoor hammock installation. Start by locating wall studs, which are typically spaced 16 to 24 inches apart. Use a stud finder to guarantee secure mounting of eye bolts. The minimum hang distance recommended for a hammock is approximately 9 feet. This spacing allows for the necessary sag, enhancing comfort. In smaller rooms, consider a diagonal hanging approach for improved space utilization. If wall mounting isn’t an option, select a hammock stand that matches the length and weight capacity of your hammock. Always use reinforced anchor points and heavy-duty hardware. This guarantees the installation can support weight while withstanding downward and horizontal forces during use. Prioritize safety in every step. For additional stability, consider adjustable height features in your hammock stand to accommodate various heights and ensure a proper fit.
Recommended Products

DIMENSION: The hammock stand measures 161.42" L x 45.28" W x 55.12" H, 2.7" x 1.9" square steel beams, fits most hammocks ranging from 10 ft to 13 ft in length with its adjustable chains. NOTE: hammock sold separately

OPTIMAL COMFORT AND DURABILITY: Experience unparalleled comfort with our cotton hammock, featuring 92 suspension cords that ensure even weight distribution. Enjoy stable and relaxing lounging in this indoor hammock with straps.

🍀 600 POUNDS CAPACITY 30 SECONDS SET UP HAMMOCK STAND: Made of sturdy electrostatic powder coated steel for high endurance. Rubber feet stabilize and minimize any scratching, the perfect resting station in your home or outdoor, garden, camping, trips
Importance of Wall Studs and Structural Integrity

The foundation of any successful indoor hammock installation lies in the wall studs. These structural elements are essential for safely mounting hammocks, providing the necessary support to bear weight. Wall studs are typically found 16 to 24 inches apart. Locate them accurately using a stud finder or the hammer method. For maximum safety, install hardware directly into wall studs to prevent damage to drywall and guarantee secure fastening. Verify the strength and condition of the wall material and studs. This will help accommodate the forces exerted by the hammock. Reinforce your setup by using eye bolts securely fastened into the wall studs. Following these steps will greatly enhance the structural integrity of your hammock installation, assuring a safe and enjoyable experience. When selecting hammock materials, consider high-quality materials like 210T parachute nylon, which are known for their durability and effectiveness, ensuring that your indoor setup is both comfortable and long-lasting.
Utilizing Spreaders for Increased Stability
Spreader bars play a critical role in enhancing the stability of indoor hammocks. They increase the width of the hammock, creating a flatter surface for sleeping. This design prevents the sides from collapsing, which is especially helpful in smaller indoor spaces. When installing spreaders, verify they are securely mounted. This will account for the added tension and load on the hanging points due to the wider design. Choose materials wisely; wooden bars offer a natural look while maintaining stability, but aluminum is also efficient. Remember that spreaders may increase the distance needed between mounting points. Measure carefully to confirm proper installation. Following these guidelines will enhance the hammock experience when sleeping indoors. Additionally, opting for eco-friendly materials like poly-cotton blends can enhance comfort while reducing environmental impact.
Recommended Products

HAMMOCK STAND FOR DOUBLE SIZE HAMMOCKS: High-quality and heavy duty hammock stand with a total length of up to 12 ft 2 in. Our hammock frame fits the size of 11 ft 9 in hammocks.

STABILITY WITH SPREADER BAR: Experience a more stable and flatter surface with our outdoor hammock with stand featuring spreader bars, ensuring even weight distribution for enhanced comfort in your hammocks for outside with stand.

Comfortable and Non-fading: Two-layer quilted polyester fabric with poly fiber filling which is cozier, best for camping and outdoor activities. Compared with other quilted hammocks, it will not fade after long-term usage. A polyethylene-stuffed head pillow offers superior comfort
Hammock Hang Calculator Usage
Using a hammock hang calculator simplifies the process of finding ideal hanging points for indoor hammocks. First, measure the distance between the two mounting points. Ascertain this distance is at least 9 feet (2.7 meters). Enter the hammock length and desired sag into the calculator. The results will provide best angles for hanging, which are essential for comfort and safety. Keep in mind your indoor space dimensions, as they may limit hang distances. Use the calculator’s guidance to install eye bolts or a hanging kit in suitable locations. This guarantees proper support for your hammock. Consider the durable construction of your indoor hammock setup to ensure it withstands regular use. By following these steps, one can achieve a secure and enjoyable indoor hammock experience.
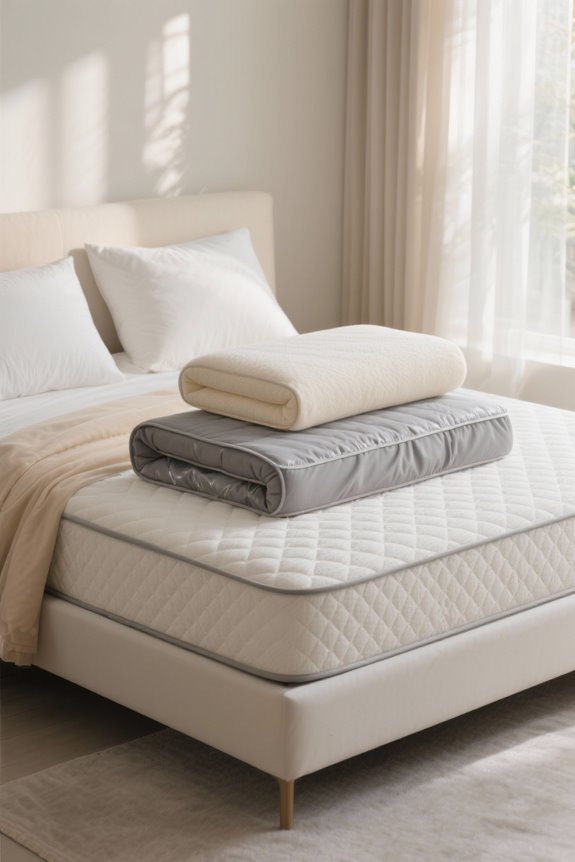
Introduction to Underquilts
Underquilts serve as essential gear for hammock users, especially in colder conditions. An underquilt is designed to hang beneath the hammock and prevent heat loss from the cold air underneath. This insulation is effective because it remains uncompressed by body weight, unlike traditional sleeping pads. Underquilts offer superior warmth thanks to high-loft insulation materials. They come in various sizes and weights, ranging from lightweight options at 210 grams to heavier varieties over 400 grams. When choosing an underquilt, verify it fits snugly against the hammock to minimize air gaps. This guarantees maximum thermal efficiency and comfort during chilly nights. Additionally, consider temperature ratings to match different weather conditions for best warmth and support. For optimal breathability and softness, consider materials such as high-quality cotton that also provide comfort and safety.
Setting Up a Hammock Underquilt
Setting up a hammock underquilt requires careful attention to detail for ideal warmth. Begin by laying the underquilt securely inside the hammock. Attach each end tightly to minimize gaps that may permit cold air intrusion. Guarantee the underquilt hangs snugly beneath the hammock to maximize warmth retention. Adjust side attachments to eliminate airflow gaps, achieving a secure fit against the fabric. A tensioning cord or a Moskito hammock with a ridgeline can enhance attachment and reduce cold air entry. Make minor adjustments in ½ inch increments, preferably while someone is inside the hammock to check for comfort and air gaps. Consider using a sleeping pad for additional insulation if needed. Proper setup guarantees a warmer and more enjoyable resting experience. For additional comfort, consider using OEKO-TEX certified materials for their safety and environmental sustainability, ensuring a healthier sleep environment.
Enhancing Warmth and Comfort With Underquilts
To enhance warmth and comfort while sleeping in a hammock, selecting a suitable underquilt is essential. Underquilts provide effective insulation, preventing heat loss from cold air beneath the hammock. Choose materials that are durable and water-repellent, with insulation types like down or synthetic for ideal temperature management. Proper attachment is key; ascertain the underquilt fits snugly to minimize air gaps that can create cold drafts. For increased thermal efficiency, consider combining the underquilt with an inflatable insulating mat. Check temperature ratings when selecting an underquilt to match the expected outdoor conditions. This guarantees adequate warmth and comfort during your hammock experience. A well-chosen underquilt enhances sleep quality and overall satisfaction. When choosing an underquilt, consider lightweight materials like nylon that facilitate easy transport and setup.
Recommended Products

WARM DOWN INSULATION: The Firebelly 30ºF backpacking quilt features Downtek responsibly sourced, water-repellent down, so water beads up and rolls right off. Downtek down absorbs 30% less water and dries 60% faster than untreated down, retaining more loft and keeping you warmer after exposure to moisture. The Insotect Flow honeycomb structure of insulation ensures even distribution of warmth, eliminating cold spots to keep you toasty while keeping the insulation securely in place.

JUNGLE EXPLORER ZIP has a 100% bug proof double bottom for greater mosquito protection and to hold the accessory Radiant Heat Reflecting Double Bubble Pad XL between the layers on the correct diagonal; Designed for anyone up to 7 ft and 300 lbs / 213 cm and 135 kg; Side entry with a strong, full length #8 YKK zipper with 2 double sliders; Elastic “hold open” for mesh so you can watch the stars on clear nights;

WARM DOWN INSULATION: The Bobcat 45ºF features Downtek responsibly sourced down. Downtek is water-repellent, keeping you dry and lengthening the life of your quilt. Whether in camping in the backcountry, traveling in the city, or somewhere in between, this down quilt offers lightweight superior warmth in unexpected places.
Budget-Friendly Insulation Tips
While many outdoor enthusiasts invest heavily in specialized insulation for hammocks, cost-effective options exist for those on a tighter budget. Consider using a closed-cell foam pad, which can be easily trimmed to fit your hammock for added warmth. Repurpose an old sleeping bag or quilt to create a DIY underquilt, custom-fitted to your setup. Also, use emergency blankets hung outside your hammock as lightweight summer insulation, reflecting body heat effectively. Incorporate sleeping pad wings for stability, reducing the chance of sliding and heat loss. To save even more, buy used gear or check community forums for budget-friendly insulation tips. These methods offer affordable ways to stay warm without compromising comfort.
Community Feedback and DIY Insights
Community feedback often reveals valuable insights into effective indoor hammock setups. Many users recommend using 2x lumber or heavy-duty socket supports for secure mounting. This guarantees safety during use. Users frequently share DIY solutions, such as creating custom underquilts from old sleeping bags. This enhances warmth, making hammock camping affordable. Test mount stability to check for air gaps and sag; this is essential for comfort. Attach underquilts to hammock suspension lines with tensioning cords to achieve a snug fit. This technique minimizes cold air gaps. Pair underquilts with sleeping pads for added insulation. Use these insights to enhance your indoor hammock experience and enjoy cozy nights in your hammock.
Frequently Asked Questions
Is a Hammock Underquilt Worth It?
Is a hammock underquilt worth it? Absolutely. Many users discover the comfort benefits of enhanced warmth and insulation, transforming cold outdoor nights into cozy, restful experiences that traditional sleeping pads often fail to provide.
How Do Underquilts Attach to a Hammock?
Underquilts attach to a hammock using various attachment methods, typically involving suspension cords connected to the hammock’s suspension ropes or ridgeline. This guarantees a snug fit, minimizing air gaps for effective insulation against cold.
How to Safely Hang a Hammock Indoors?
To safely hang a hammock indoors, locate wall studs, use heavy-duty hardware, maintain a minimum distance of nine feet, and test the setup thoroughly. Prioritizing hammock safety guarantees comfort and prevents accidents during use.
How Much Does a Good Underquilt Cost?
A good underquilt typically costs between 109.00 € and 149.00 €, depending on the brand and features. The XXL option is priced around 119.00 €, catering specifically to larger hammock sizes and ensuring adequate warmth.